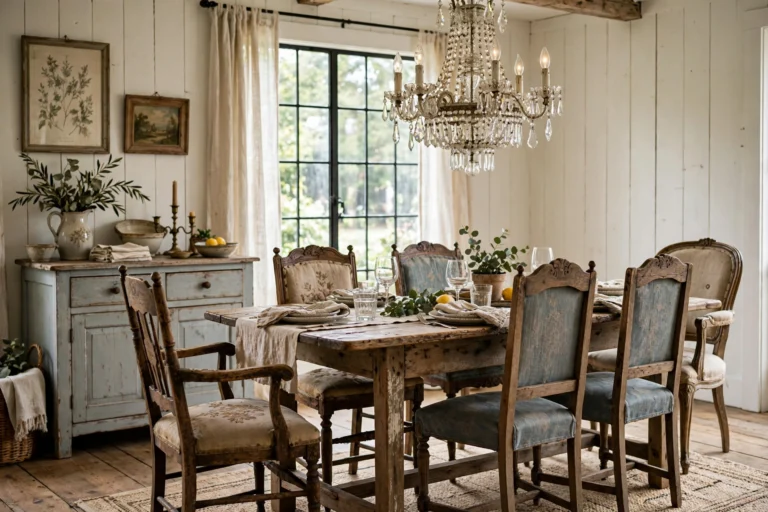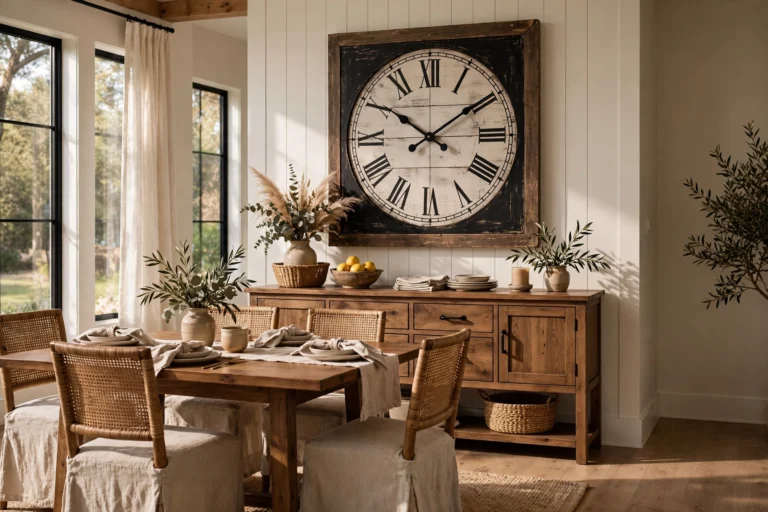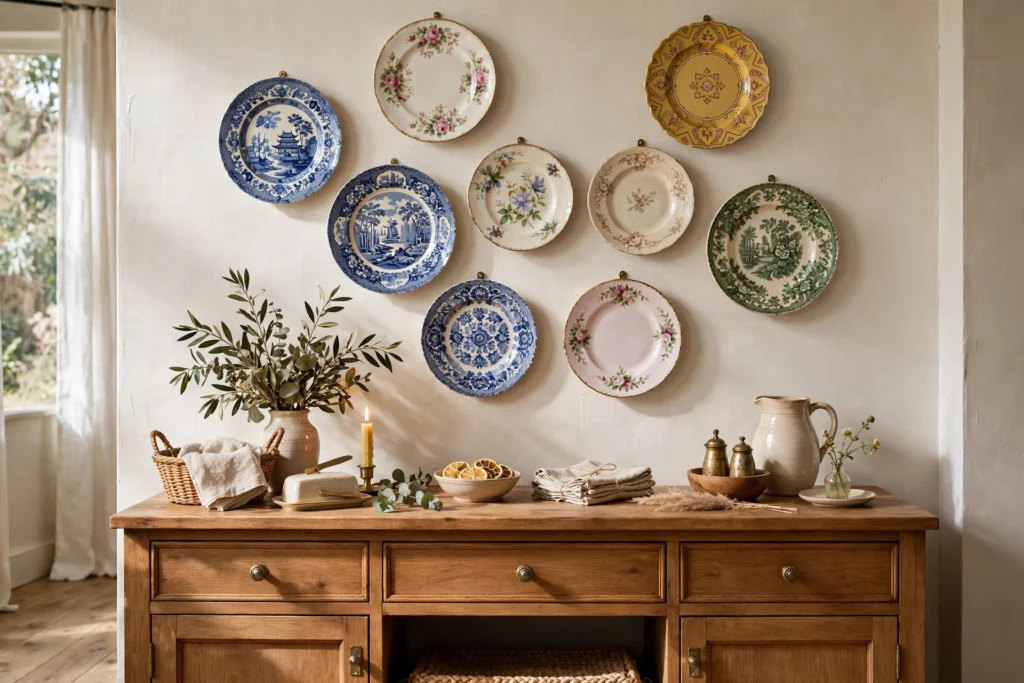

Hanging plates is one of the oldest tricks in the decorating playbook, and for good reason. Long before gallery walls became trendy, homemakers were arranging beautiful dishes above sideboards and buffets — and the look never really left. The best dining room plate wall ideas treat your plates as art: the patterns, glazes, and silhouettes of dinnerware become a layered, dimensional display that flat artwork simply cannot match.
Whether you are working with a full set of heirloom china, a thrifted mix of vintage finds, or modern stoneware in a single color family, these dining room plate wall ideas cover layouts, hanging hardware, spacing, and styling so your plate wall looks intentional rather than cluttered. Measure first, hang once, and enjoy a focal point that sparks conversation at every meal.
1. Start With a Paper Template Layout
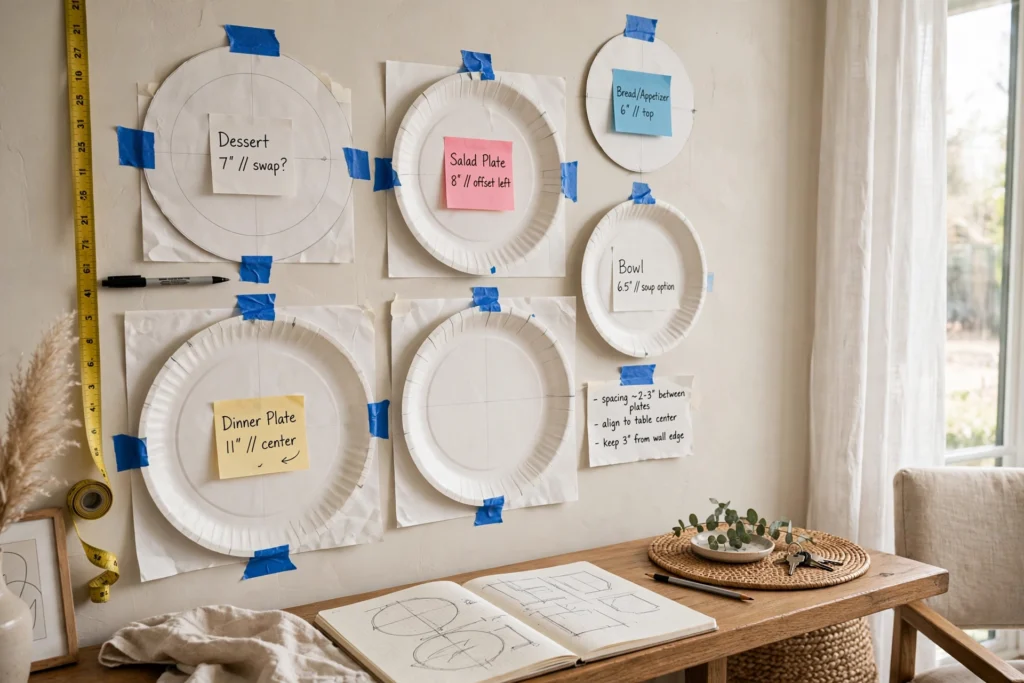
Before a single nail goes in the wall, trace each plate onto kraft paper or newspaper, cut out the shapes, and tape them to the wall with painter’s tape. This low-effort rehearsal is the difference between a polished plate wall and one you will be patching with spackle. Arrange and rearrange the paper circles until the composition feels balanced, then mark each center point with a small pencil dot.
Aim for 2 to 4 inches of space between plates — enough breathing room to read each piece, tight enough that the group reads as one display. Step back and view the layout from the dining table where you will actually sit; a plate wall that looks good at eye level can feel crowded when seen from a chair. Once you commit, hang the real plates exactly where the paper was, working from the largest piece outward.
2. Hang Plates in a Perfect Grid
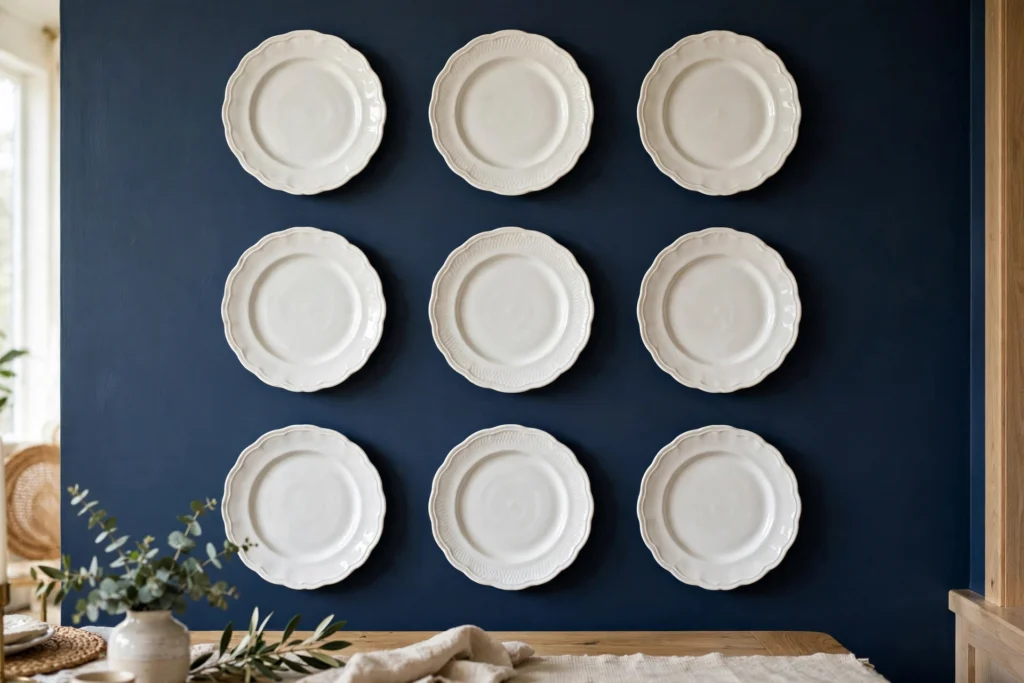
A grid layout brings instant order to a plate wall, making it the right choice for modern or formal dining rooms where symmetry matters. Use plates of identical or near-identical size — 10-inch dinner plates work beautifully — and space them in a strict square grid with 3 inches of clearance on all sides. A 3-by-3 grid of nine plates fills roughly a 40-by-40-inch square, ideal above a standard 60-inch sideboard.
The secret to a crisp grid is a level and a measuring tape, not an eye. Mark your horizontal and vertical guidelines lightly in pencil, hang the center plate first, then build outward. Uniform plate hangers keep every dish sitting at the same height. The result looks tailored and gallery-like, and it is one of the most forgiving dining room plate wall ideas because the math does all the design work for you.
3. Create an Organic Cluster Over the Buffet
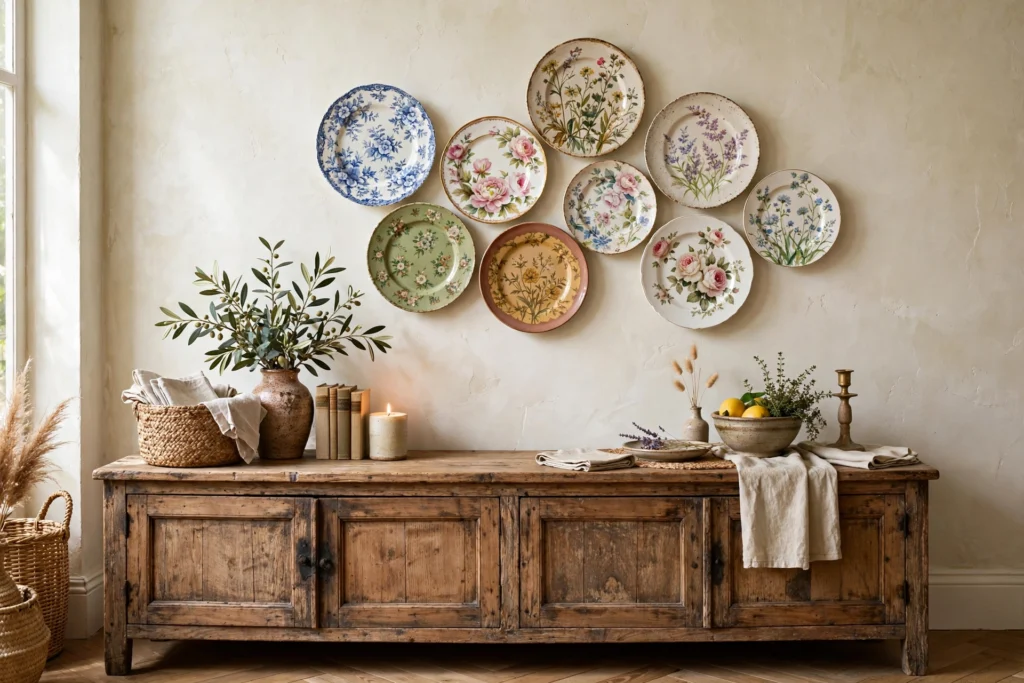
An organic cluster feels collected over time, even if you hung it all in one afternoon. Mix plate sizes from 6-inch saucers to 12-inch chargers and let the arrangement follow a loose, cloud-like shape rather than rows. Start with the largest plate slightly off-center — about two-thirds up from the bottom of your planned area — then ring it with medium and small pieces, filling gaps so no single plate floats alone.
Keep the overall footprint contained, roughly the width of your buffet plus 6 inches on each side, so the cluster anchors the furniture below. This style shines with mismatched vintage finds because irregularity is the whole point. Step back every three or four plates to check balance; it is easy to drift heavy on one side without noticing. For more ways to style the wall above your serving furniture, see these dining room wall decor ideas.
4. Mix Patterns Within One Color Family
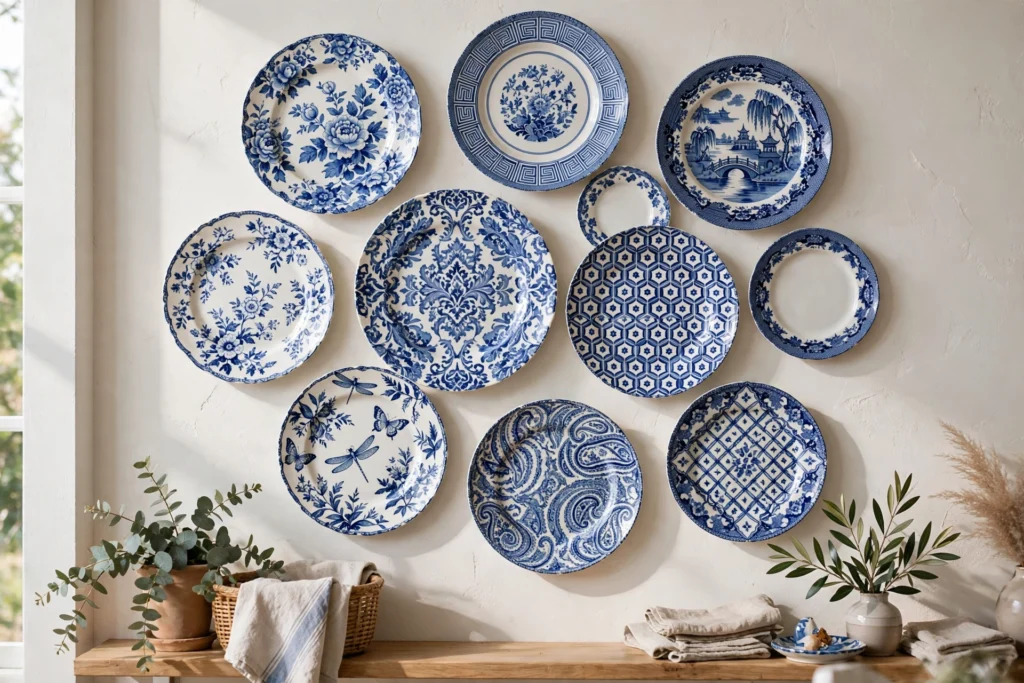
Cohesion without monotony is the trick here: choose plates in different patterns but a shared color palette, such as all blue-and-white or all warm terracotta tones. This approach lets you combine grandma’s china with flea-market finds and modern stoneware without the display feeling random. The shared color is the thread that ties everything together, so limit yourself to two colors maximum plus neutrals.
When hunting, look for transferware, ironstone, and hand-painted pieces in the same hue family. Before hanging, lay all candidates on the floor and remove any plate whose color veers too far — one lime-green outlier will pull the whole wall off course. Aim for a ratio of about 60 percent dominant color to 40 percent supporting tones, and let the busiest patterns take the center stage while simpler plates fill the edges.
5. Frame the Display Around a Single Statement Plate
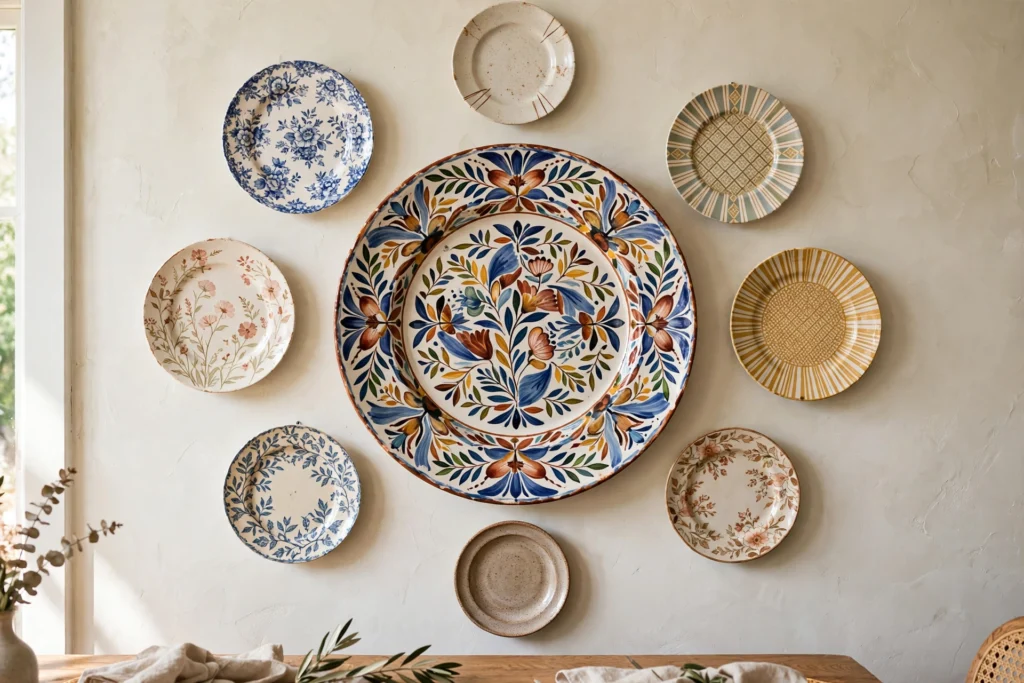
One extraordinary plate — a hand-painted platter, an antique charger, a bold oversized piece — can anchor an entire wall. Hang the statement plate dead center at eye level, roughly 57 to 60 inches from the floor to its center, then build concentric interest around it with smaller, quieter plates. The supporting pieces should be visually simple: plain rims, soft solids, or subtle patterns that do not compete.
Give the star at least 5 to 6 inches of clearance on every side so it reads as the hero rather than just another plate. A 14-inch charger surrounded by 7- and 8-inch dessert plates creates a sunburst effect that feels deliberate and dramatic. This is one of the most effective dining room plate wall ideas for small walls because a single anchor keeps the composition from feeling scattered.
6. Use Invisible Plate Hangers for a Floating Look
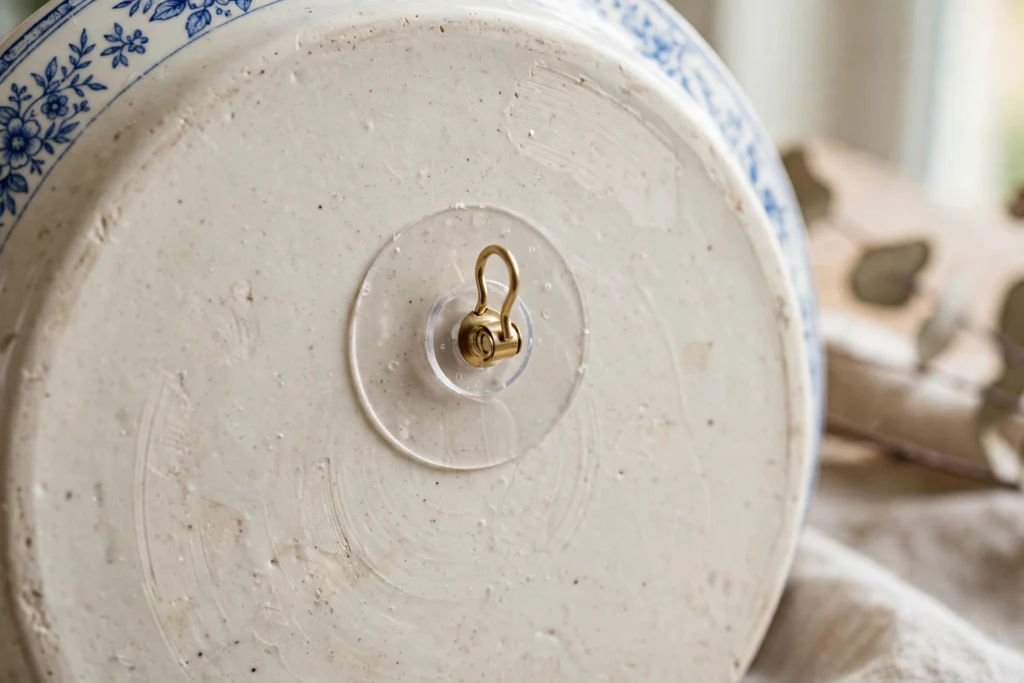
Adhesive disc hangers — the round discs with a wire loop that bond to the back of a plate — create the illusion that your plates float on the wall, with no visible springs or wires from the front. Clean the back of each plate with rubbing alcohol, warm the adhesive disc under hot water for a few seconds to activate the glue, press firmly for 60 seconds, and let it cure for a full 24 hours before hanging.
These hangers hold best on flat-backed plates; plates with deep foot rings may need a spring-style wire hanger instead. It helps to know your dishware: the humble plate comes in flat, rimmed, and coupe shapes, and flatter profiles hang most securely. They are rated for specific weight ranges, so check the packaging against your heaviest charger — most standard discs hold up to 5 pounds, plenty for dinnerware. One warning: adhesive hangers are not ideal for irreplaceable heirlooms on textured walls, because removal can pull glaze; for precious pieces, spring hangers with protective plastic tips are the safer call.
7. Build a Salone-Style Floor-to-Ceiling Display
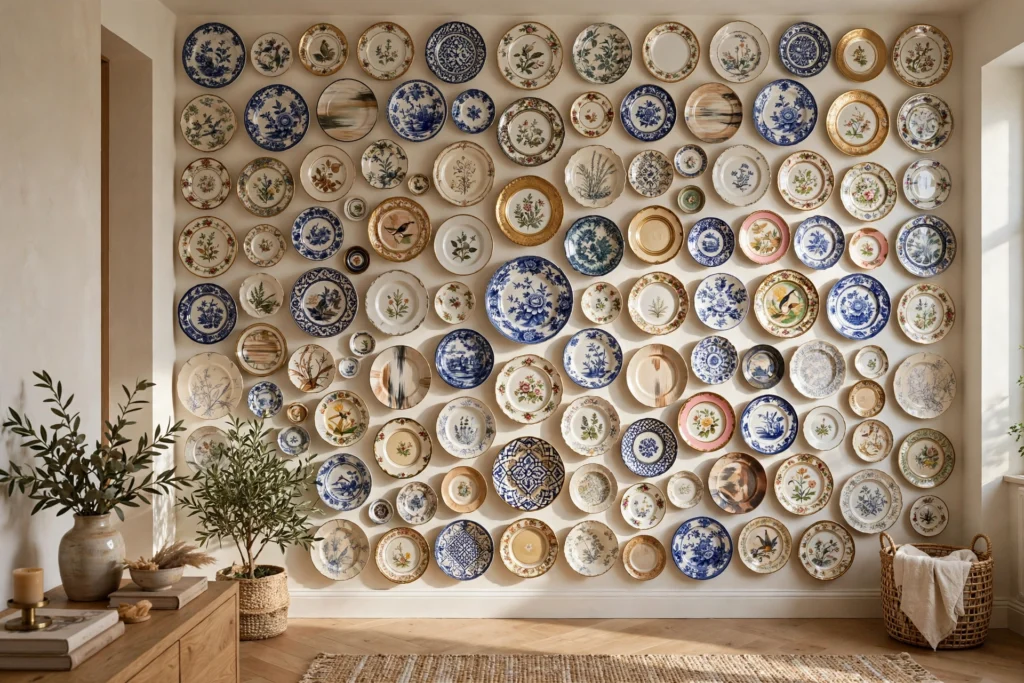
For a dramatic dining room, take the plate wall from wainscoting to ceiling in a salon-style arrangement, covering the entire wall behind the buffet. This maximalist move works best in dining rooms with high ceilings and simple furniture, since the plate wall itself becomes the room’s artwork. You will need 25 to 40 plates depending on wall width, so this is the perfect project for a long-term collecting habit.
Start with your largest platters near the center at eye level, then fill outward and upward with descending sizes, keeping 2- to 3-inch gaps. Because you are covering so much area, keep the palette tight — all white, all blue-and-white, or one metallic accent repeated — to prevent visual chaos. If the idea of a full china collection appeals to you, browse these dining room china cabinet ideas for coordinating storage inspiration.
8. Pair Plates With a Contrasting Wall Color
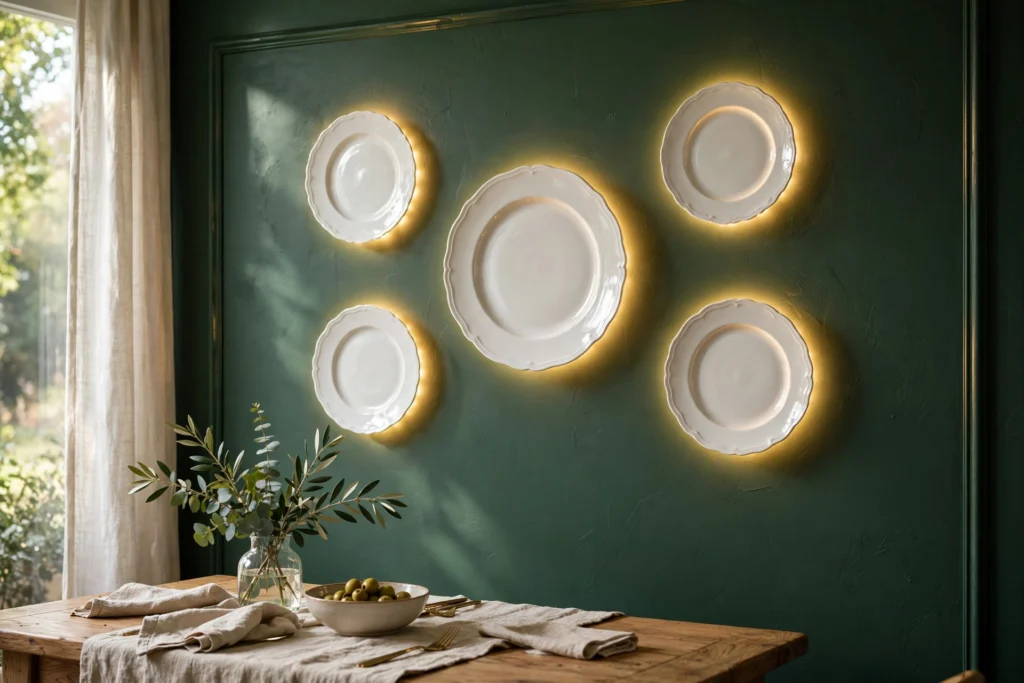
The wall behind your plates is half the design. Deep, saturated paint — navy, forest green, charcoal, or even black — makes white and cream plates glow and gives colorful patterns a museum-like backdrop. A high-contrast wall turns even plain white everyday dishes into a striking graphic display. If you prefer light walls, try the opposite: boldly colored plates against soft white or warm greige for a fresh, airy feel.
Paint first and hang second, allowing at least two weeks of cure time on fresh paint so adhesive hangers bond properly. Consider the finish too: eggshell or satin paint hides imperfections better than flat when you are hanging dozens of plates. For bold wall treatments that play well with dishware displays, explore these dining room accent wall ideas to find your perfect backdrop.
9. Add Small Plates as Filler Between Large Ones
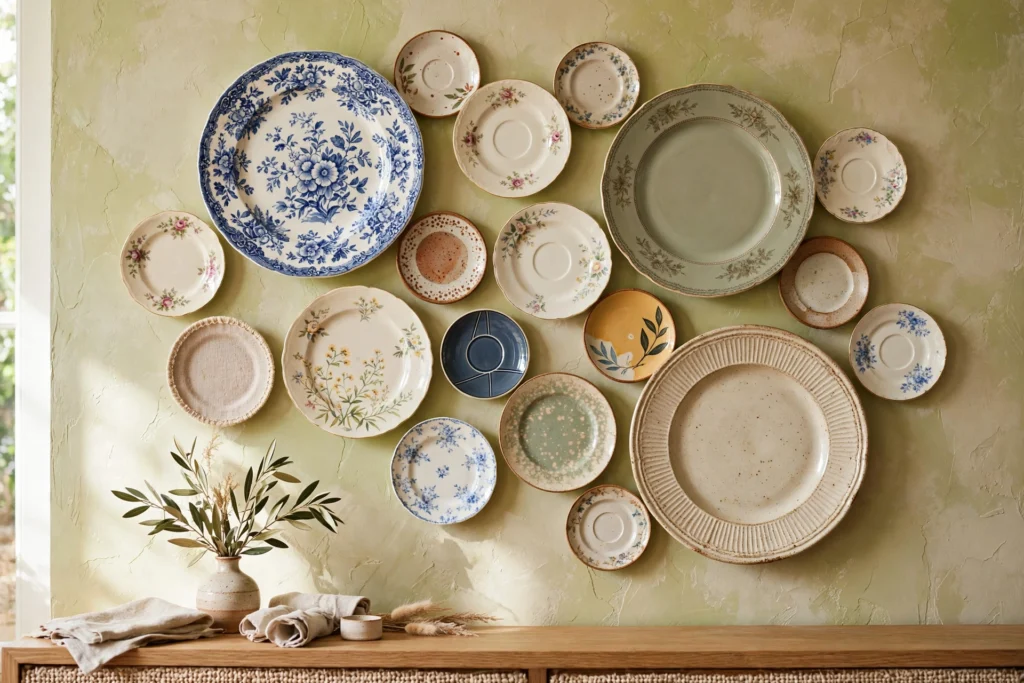
The difference between a good plate wall and a great one often comes down to the little plates. Six- and seven-inch saucers, bread plates, and dessert plates fill the awkward gaps between statement pieces and keep the eye moving across the display. Without these fillers, a plate wall can feel spotty, with large plates floating in disconnected isolation.
Hunt thrift stores specifically for small plates in your palette; they are the cheapest pieces to buy and the hardest to have too many of. When placing them, tuck small plates into the negative space between larger ones rather than clustering them in their own zone. A useful rule: if you can fit your fist between two large plates, a small plate probably belongs in that gap.
10. Try an Asymmetrical Ribbon or Wave Arrangement
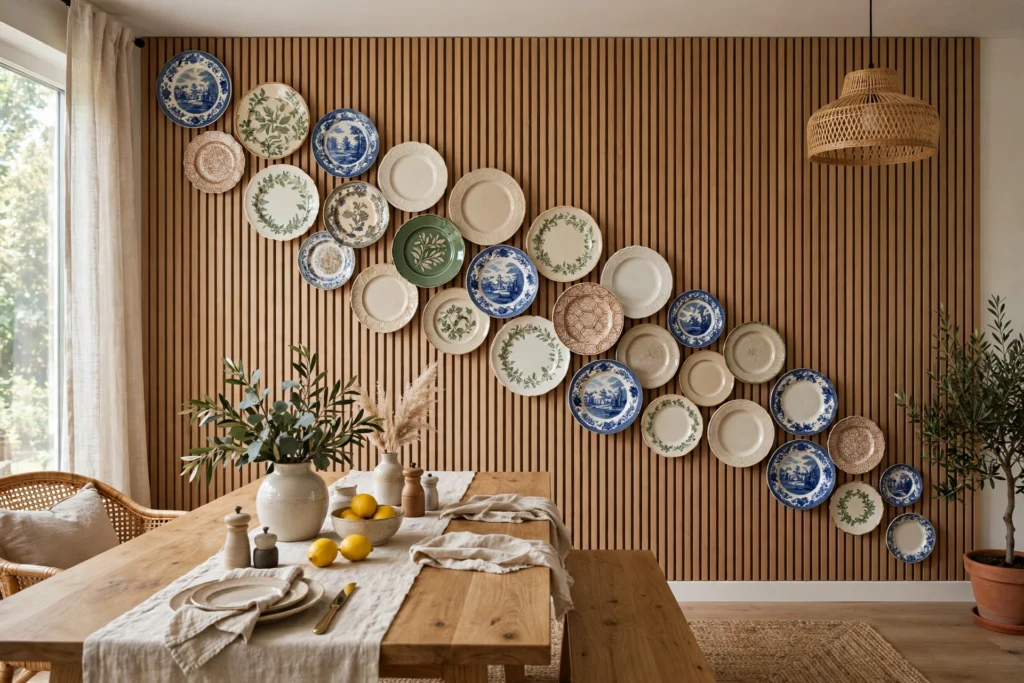
Instead of a centered cluster, arrange plates in a sweeping ribbon or wave that flows diagonally across the wall — starting low on one side and rising to the other. This dynamic composition adds movement to a dining room and works beautifully on long walls where a centered display would feel lost. Use a gradual size progression, larger plates at one end flowing to smaller ones at the other.
Map the wave with your paper templates first, taping them in a gentle S-curve and adjusting until the flow feels natural. Keep spacing consistent at 2 to 3 inches even as sizes change. This layout pairs well with a long, low sideboard or banquette seating, since the diagonal line echoes the horizontal stretch of the furniture while adding energy.
11. Combine Plates With Other Wall Decor
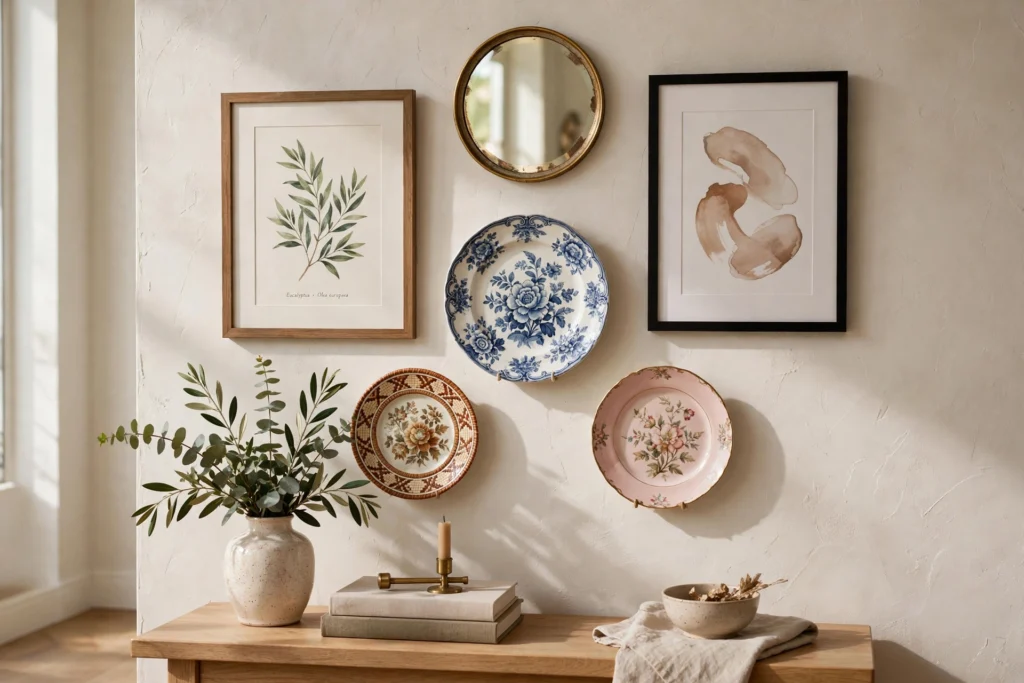
Plates do not have to fly solo. Weave in small framed prints, a vintage serving spoon or two, a small mirror, or a wooden cutting board to create a mixed-media gallery wall with texture and depth. The key is proportion: let plates dominate at about 70 percent of the display, with other objects acting as accents in the remaining 30 percent.
Place the non-plate elements where a plate would feel expected — breaking a row, filling an odd corner — so they feel integrated rather than tacked on. A small round mirror among round plates, for instance, reads as a clever visual rhyme. Keep frames thin and simple so they do not fight the plates’ rims, and stick to the same 2- to 4-inch spacing rhythm across all objects.
12. Hang a Symmetrical Pair Flanking a Window or Mirror
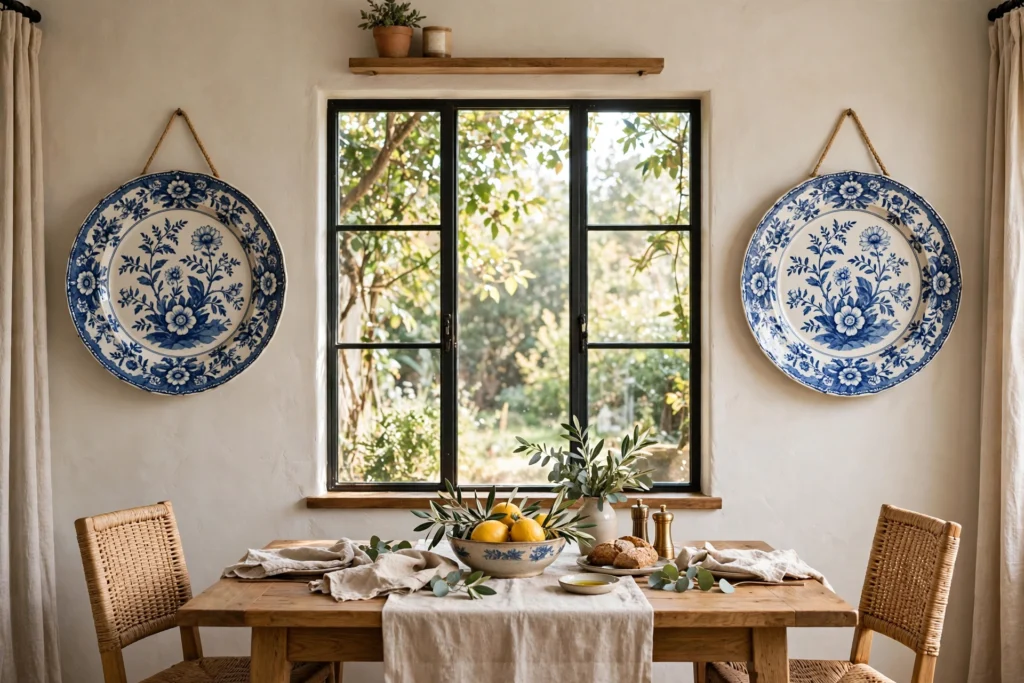
Sometimes less is more: two matching platters or chargers, hung symmetrically on either side of a window, mirror, or doorway, deliver quiet elegance with minimal effort. This approach suits traditional and transitional dining rooms where restraint is the whole aesthetic. Choose plates at least 12 inches across so they hold their own against the architecture.
Measure from the window casing outward so both plates sit at identical distances — even a half-inch difference will be visible. Hang the plate centers at 57 to 60 inches from the floor, aligned with the window’s midpoint. This mirrored placement draws the eye across the room and makes the dining space feel wider, a neat trick for narrow dining rooms.
13. Display Plates on a Picture Ledge Instead
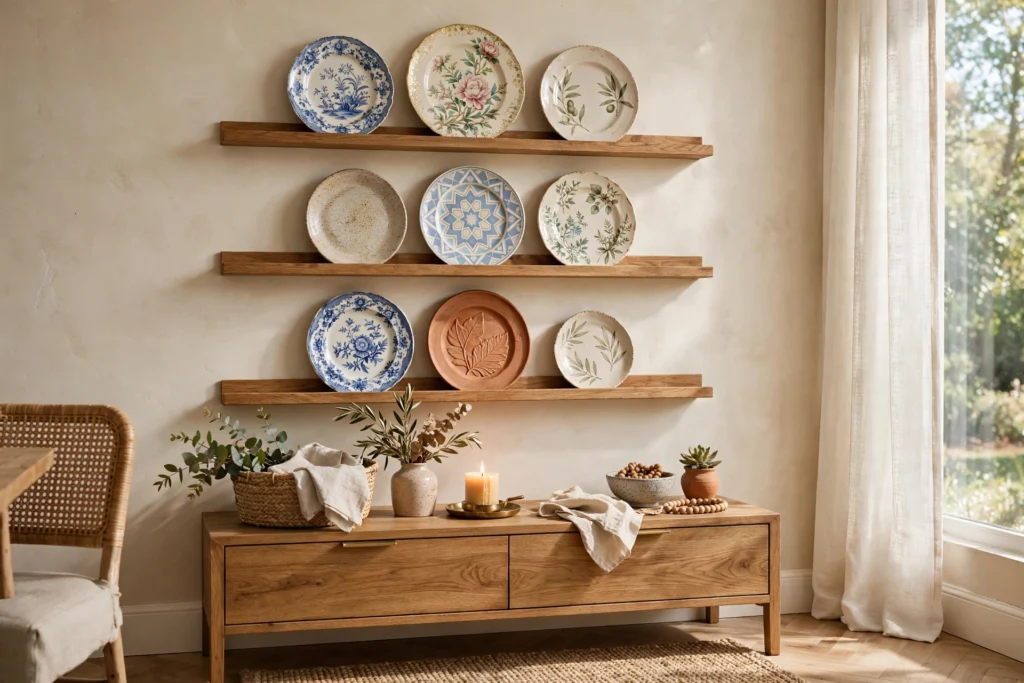
If the thought of drilling dozens of holes makes you nervous — or you are renting — a picture ledge offers a drill-light alternative. Mount one or two sturdy ledges above the sideboard and simply lean plates against the wall, overlapping them slightly like shingles. A 48-inch ledge holds five to six 10-inch plates; stack a second ledge 14 inches above the first for a fuller look.
Use museum putty or small plate stands behind each plate to keep them from sliding, and choose ledges at least 3.5 inches deep so plates sit securely. The ledge approach has a bonus: you can swap plates seasonally in minutes, refreshing the display for holidays or dinner parties without touching a single hanger.
14. Go Monochrome With All-White Dinnerware
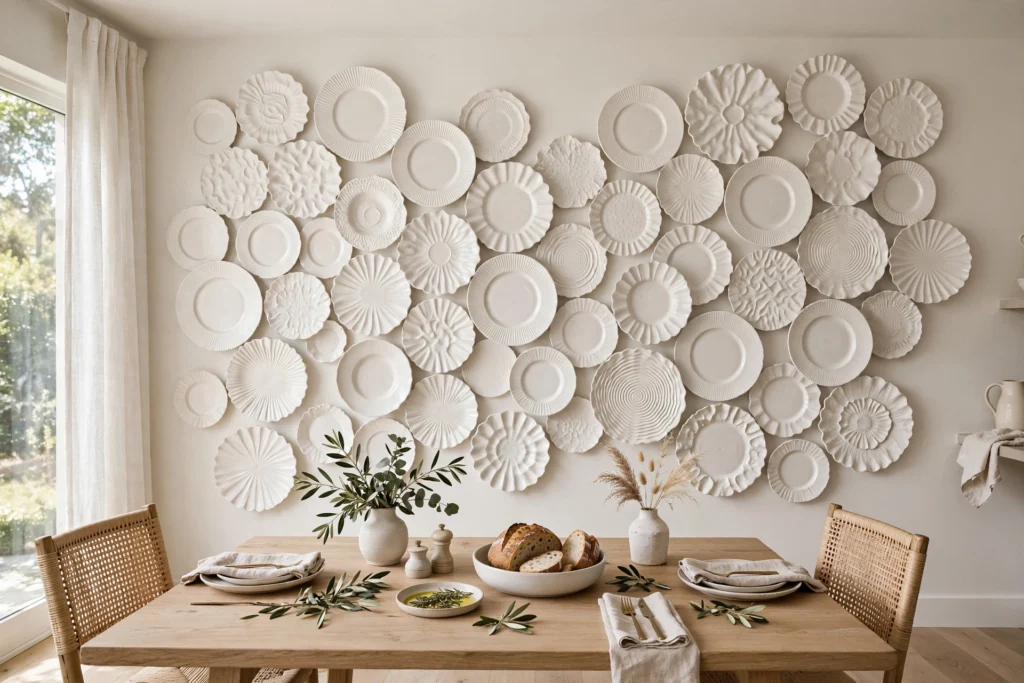
An all-white plate wall is the minimalist’s answer to this classic decor move. Gather white plates in varied textures — ribbed rims, scalloped edges, matte stoneware, glossy porcelain — and hang them in a tight organic cluster. The lack of color lets form and shadow do the talking, and the result looks sculptural and serene rather than country-cottage.
This approach is wonderfully practical: white plates are the easiest to find, the cheapest to buy in multiples, and simple to replace if one breaks. Classic white porcelain and ironstone pieces are especially good hunting grounds at thrift stores because they were produced in enormous quantities. It also photographs beautifully and works in every dining style from Scandinavian to coastal to modern farmhouse. For extra dimension, include a few white platters with raised patterns or embossed details that catch the light differently throughout the day.
15. Light Your Plate Wall Like a Gallery
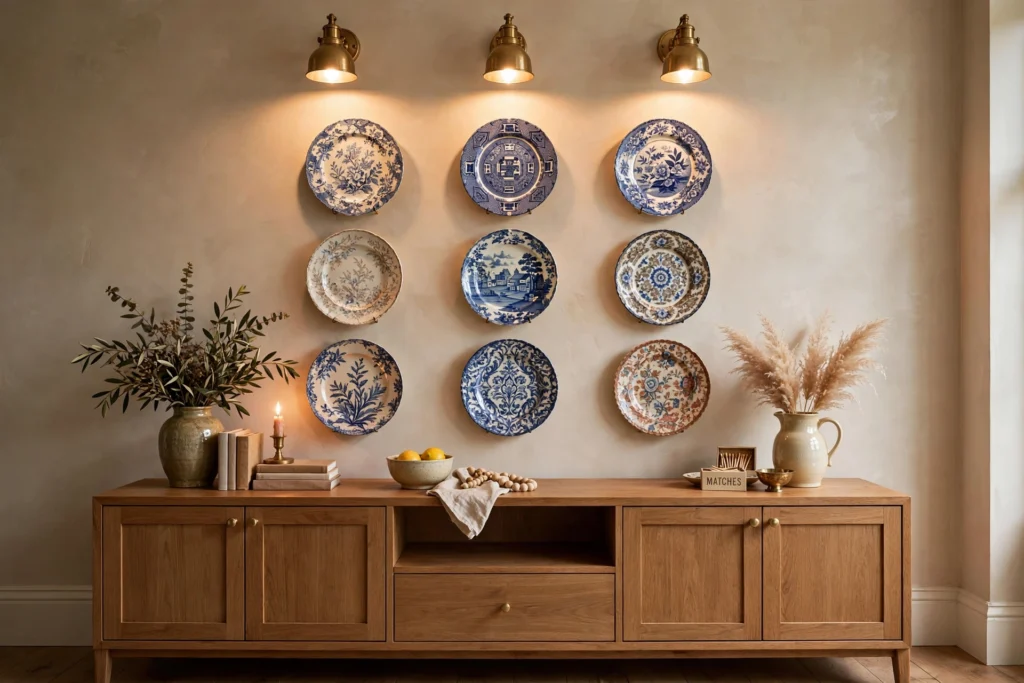
The final touch that separates amateur from polished: dedicated lighting. A pair of small picture lights mounted above the display, or adjustable track heads aimed at the wall, makes glazes gleam and patterns pop after dark — exactly when your dining room sees the most use. Battery-operated LED picture lights are a renter-friendly option that install in minutes with no wiring.
Choose warm white light (2700K to 3000K) to flatter food-adjacent colors; cool daylight bulbs can make warm glazes look sickly. Position lights 6 to 8 inches above the top of the display and angle them at about 30 degrees to minimize glare on glossy finishes. If hardwiring feels like too much, even a nearby floor lamp with a directional head aimed at the wall adds meaningful glow.
Frequently Asked Questions
How do you hang plates on the wall without damaging them?
Use spring-style wire plate hangers with vinyl-coated tips for everyday pieces, or adhesive disc hangers that bond to the back of the plate for an invisible look. Avoid drilling into plates entirely. For valuable antiques, spring hangers are safest because adhesive discs can pull glaze when removed. Always check the weight rating on the hanger packaging against your heaviest plate.
How far apart should plates be on a plate wall?
Leave 2 to 4 inches of space between plates in most arrangements. Tighter spacing (2 inches) creates a lush, collected feel, while wider spacing (3 to 4 inches) suits formal grids and modern rooms. Give a single statement plate 5 to 6 inches of clearance on all sides so it stands out from its supporting pieces.
What is the best height to hang a plate wall in a dining room?
Hang the center of your arrangement — or the center of your largest plate — at 57 to 60 inches from the floor, which is standard eye level. If the plates hang above a sideboard or buffet, leave 6 to 10 inches of clearance between the top of the furniture and the bottom of the lowest plate so the display feels connected to the piece below.
Can you hang a plate wall in a rental without drilling?
Yes. Adhesive disc hangers still need a nail or hook in the wall, but you can avoid drilling entirely with a picture ledge system (just two screws for the whole display) or by using removable adhesive hooks rated for each plate’s weight. Leaning plates on a deep ledge is the most renter-friendly option and makes seasonal swaps effortless.
How many plates do you need for a plate wall?
A small accent display needs 5 to 9 plates; a standard cluster over a sideboard typically uses 9 to 15; and a dramatic floor-to-ceiling salon wall can take 25 to 40. Start with what you have — even five well-arranged plates look intentional — and add to the collection over time as you find pieces in your palette.
Keep Exploring
A plate wall is one of the most personal things you can hang in a dining room — every piece carries a memory, a trip, or a family story. Start with the layout that fits your wall, hang with care, and let your collection grow; the most charming plate walls are the ones that evolve plate by plate over the years.